


This tin glazed earthenware figure, dated 1679 and thought to have been manufactured in London, was originally thought to represent Apollo but research has linked the imagery to early representations of fire than to a specific God and so the figure is now named ‘Ignis’. Conservation of the figure was undertaken to both improve the appearance of the figure and its structure.
Stage 1
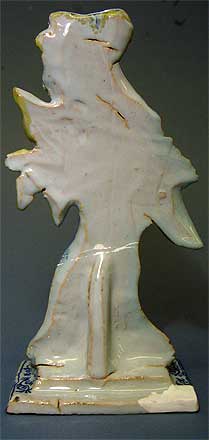
Ignis arrived in the conservation laboratory having undergone past restoration attempts of various standards.
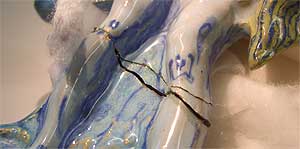
Old, discoloured adhesive and paint were immediately visible, both on the surface, and in the cracks and areas where fragments were not properly aligned.
These areas had gathered substantial amounts of dirt in addition to the fine layer of particulate dirt covering the entire object.
Stage 2
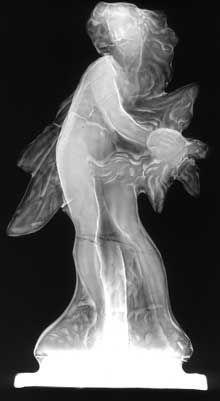
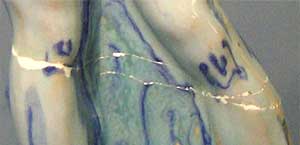
Further investigation by x-radiography showed that what appeared to be a clean break actually comprised of many tiny fragments.
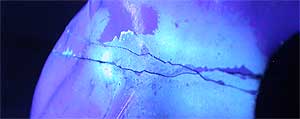
The extent of overpainting was clearly visible under ultraviolet light - a method of investigation which also revealed the past use of an airbrush to apply paint.
A few areas of restoration were found that were previously unknown - since these were neither discoloured nor obvious, it was decided to leave them in place.
Stage 3
As the exact nature of past treatments was unrecorded, there were concerns that some of the glue used to bond the broken parts may have been irreversible. Thankfully, none of the previous work posed any problems.
The adhesive dissolved readily with the use of solvent on a poultice, and the breaks separated cleanly into two large pieces, one smaller piece and a group of tiny fragments.
Great care was taken to record the original positions of all the fragments so that they could be replaced.
Stage 4
Once the broken surfaces had been thoroughly cleaned of old adhesive residues, a layer of consolidant (a diluted version of reversible conservation grade adhesive) was applied to seal the edges and prepare them for re-adjoining.
The consolidant was also used to secure the tiny fragments, which were positioned using tweezers.
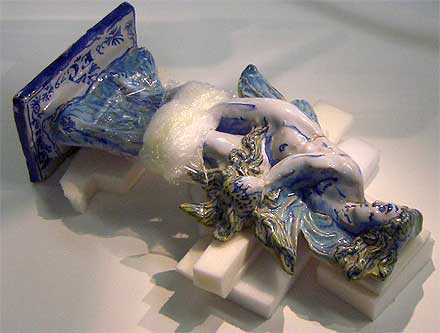
For the larger pieces, a thicker solution of adhesive was applied by brush. The pieces had to be joined rapidly before the adhesive began to harden, but the adhesive could not be considered fully cured for 24 hours. Since the break was horizontal, there was no need for pressure to be applied either side of the joint, as the shape and weight of the object itself were pushing the join together. However, to ensure stability of the base and prevent accidental damage, supports such as vinyl gloves filled with sand were used.
Stage 5
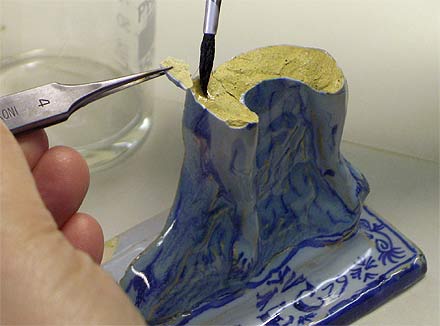
Areas of the object had been gap filled with plaster in the past, and one of the fills, since it was still viable, had been left in place during the dismantling process.
Rather than using plaster for the new fills, a more reversible acrylic gap filling material was used. The filler prevents dirt collecting in the cracks and also provides a smooth base for inpainting.
Stage 6
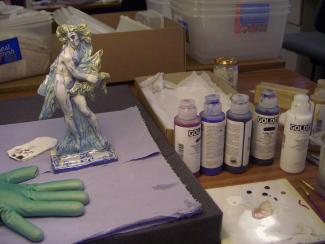
The inpainting took place in two stages, with conservation grade acrylic paints: Initially, the colour of the earthenware was matched to provide a base coat. Then, several layers were applied to blend in with the surprisingly varied colours and opacities of the tin glaze.
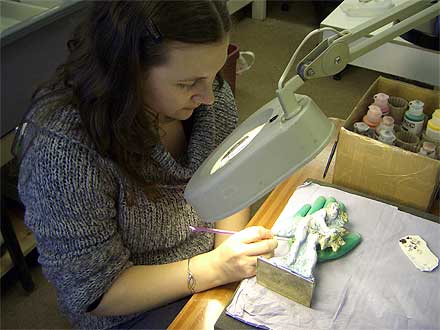
Details in blue were applied last, before the paint was coated with several layers of an acrylic gloss medium.
It was decided that that the paint would be applied by brush, rather than airbrush, keeping any overpainting of original surface to an absolute minimum. This approach makes the inpainting more obvious, but this is both acceptable and to an extent desirable: Attempting to completely hide the conservation work would be misleading, and would not correspond with current conservation principles.